Tuesday, February 13, 2007

Give Meh More Iced Coffee!!!

this is a bruce lee animation gif which many of my friends liked
deviant art deleted it without warning and therefore made my hearbroke and posted it here

my title was: "GIVE ME MORE COFFEE!!!"
a punching loop
which was taken from one of five bruce lee's movie
the Fist Of Fury, when he found out that the Japanese spy cause his master's death

well, enjoy!!

Thursday, February 01, 2007

Hey!! Would U Buy These For Me In Ur Trip To Japan?

recently i feel that parodying DeathNote is the most fun thing to do

and in order to remind my imouto-san firefox flame to buy me souvenir during her trip to japan (the plan already canceled)

i made her this picture and put it in Comic Fiesta Forum (a ACG based forum both of us go often)


the picture was taken from DeathNote Episode 1, when Light is "talking" to the tv, saying something like: "How do u arrest me when u don't even know the existence of this Deathnote?!!"

most of us find it funny and hilarious
and making parodying Light and Deathnote more fun!!

NEXT - "DEATH NOTE - TEH DIRECTOR'S CUT"

Thursday, January 04, 2007

Legs Proportion Tutorial

Well, this is a tutorial i planned to do it for quite a long time ady ^____^
enjoy ur lesson
Start Drawing!! XD


1- 1- First, draw a puppet-like joint to shape ur character’s legs (use it just for guidelines). Note that the ankle part is slimmer compare to the thigh part. The distance of ankle to the knee joint is equal to the distance from knee to the thigh joint.


2- 2- Note that the joints of the hip, knee and ankle is shown as blue dots at the picture. Their position is not perfectly center.


3- 3- Link the bones together and u will see the bone structure. This is to guide u from drawing the legs off-proportion.


4- 4- Then, start drawing the curves of the leg muscle’s anatomy on top of the puppet-like guidelines.


5- 5- Clean out the sketches and u will have a clean looking leg anatomy. Note that the proportion for outer muscle should be around 60% of the length of the limb, while the inner muscle should be around 50%. More or less than that will look ugly.


6- 6- Note that different part of the legs have different curves. Therefore, curve it so that the texture looks realistic. (the arrows shows how things are curved)


Some Example on how u can pose ur character
A- When foot is pointing straight forward
B- The foot is open outwards (a typical “man’s pose”)
C- The foot is closing inwards


Sitting with Crossed Leg
1- This is the top view of a girl sitting
2- She lifts up her right leg. (Note that her left leg closed to the center line)
3- And then she put it on top of her left leg.
4- Both of her leg is at the center.
5- Front view of the pose (Most commonly seen angle)

Monday, July 17, 2006

the stationery face

Today i managed to finish my subject - Digital Media's assignment, Neo: "make a face with 5 stationery, using photoshop" and now is already 7am
below is the report and process on how i made the face

THE FACE


and the face above is being made from these materials:

base: eraser face
1.) first, i use the eraser as the base of the face, i rotated the eraser up-side down because the eraser was dirty and it wouldn't look nice


eyes - sharpener
2.) the next process comes when i add in the eyes using the resized version of the sharpener
and this functions something like a guideline to make sure all of the facial traits are in place and correct proportional-wise


ear - scissor's handle
3.) i then cropped the handle of the scissor to use as the face's ear, putting it same height as the eyes
his left ear is mirrored because i want both ear to have the same size
and the ear is being put under the base of the face because overlapping it doesn't look good


hair, eyebrow and lips: pencil
4.) after having the basic face done, i add in the hair pencil by pencil after i cropped it out, the side of the hair is being placed under the layer of the eraser and the ear, so that the hair won't cover the ear and have a tidy look
i use the pencil to make a spiky hair look
and after putting up the pencils, i use the "eraser tool" to rub the unnessary hair to have a human hair line
then, i add in the eyebrow and lips, same as above, i use the eraser tool to touch up the shape of it


the ear ring: paper clip
5.) the fifth item will be only for decoration purpose as the requirement is 5 items to make a face
the paperclip is being used to symbolised the ear-ring
the paperclip is being cropped and placed under the layer of left-ear
artwork is supposed to look nice, therefore i chose to use 4 items for the face and 1 to enhance the looks

pls comment.

Monday, July 10, 2006

Art Tutorial: Body Proportion

i have posted this tutorial page in a forum i went often, but currently it is down, and i dedcided to post this in somewhere else too :)
this tutorial mainly talks about proportion and body scale
hope u enjoy, do drop by and post up some comment or ask questions :)
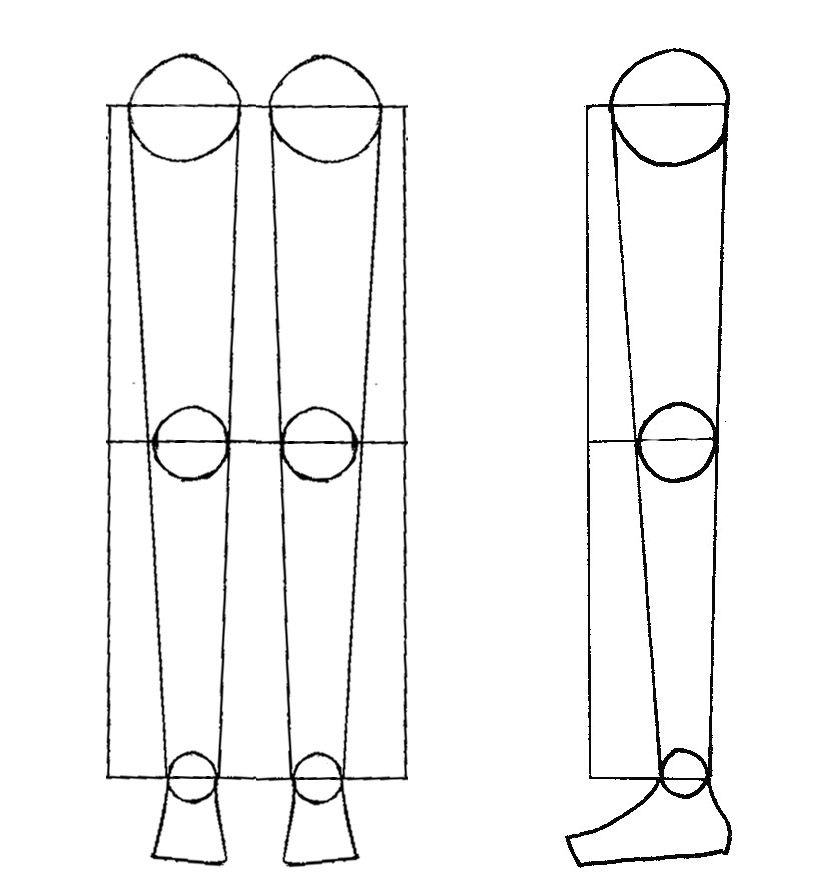
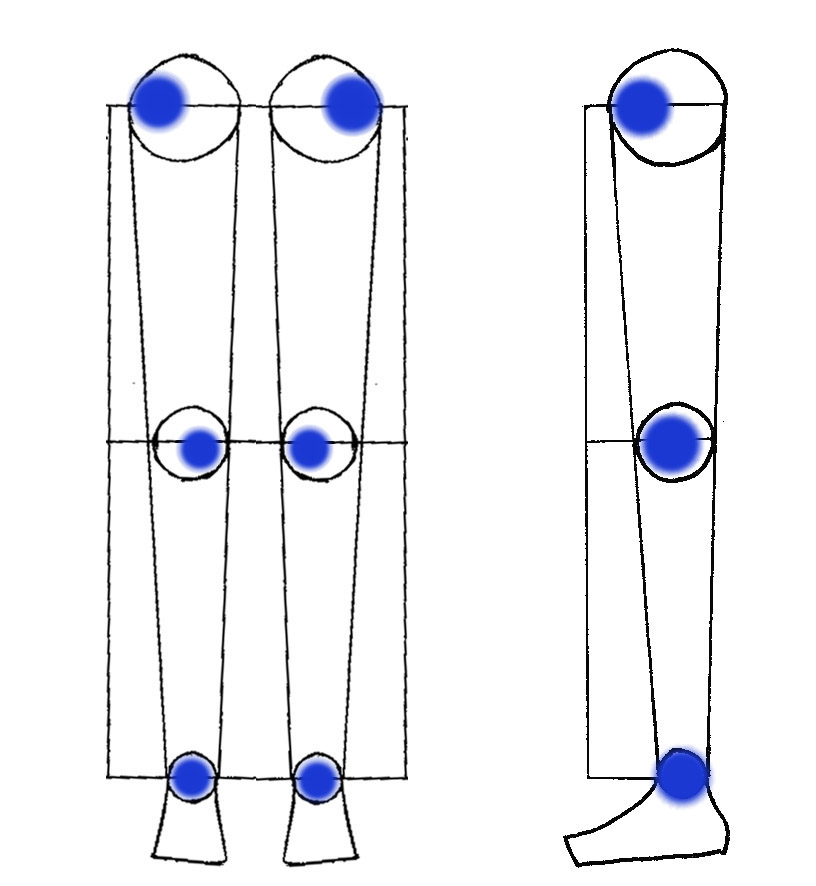
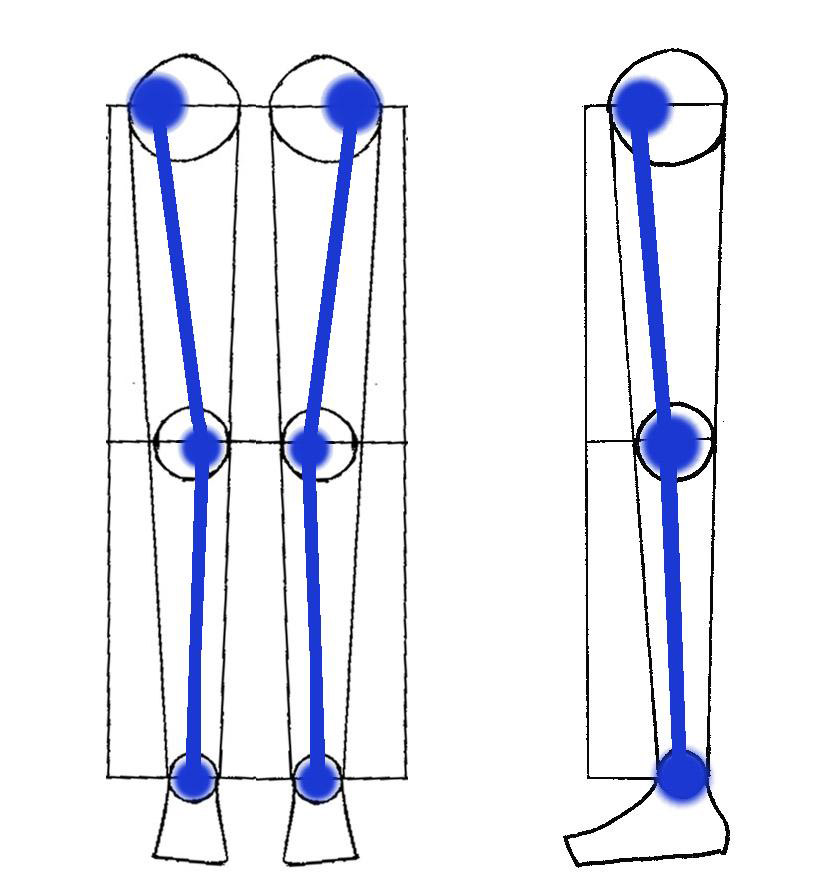

PICTURE1


The arm’s scale is being fixed, the joint A is the shoulder joint; the joint B is the elbow joint; while the area C is not a joint, but the center of the palm
The distance where A to B is equals to B to C


PICTURE2

If the wrist is twisted, then u have to swing the wrist, breaking the B to C section into 2


PICTURE3

When drawing the hands, it is better to draw the hands from 3 parts, the palm, thumb, then the four fingers. First, draw the palm. Second, add the thumb in place. Third, draw out the four fingers all together, and carefully note their length. Fourth, curl the fingers to the pose u want.


PICTURE4

Same as above, draw the palm first, then the thumb. Thirdly draw the four fingers together as if it is a boxing glove, cut the boxing glove into four piece to make the four fingers. Fourth, very good, u are learning quick.


PICTURE5

The picture note with orange colour is the neck joint. The red ones is the muscles. Don’t neglect this


PICTURE6

The orange part is the bone structure when a girl is stretching backwards. The red colour is the ribs.


PICTURE7

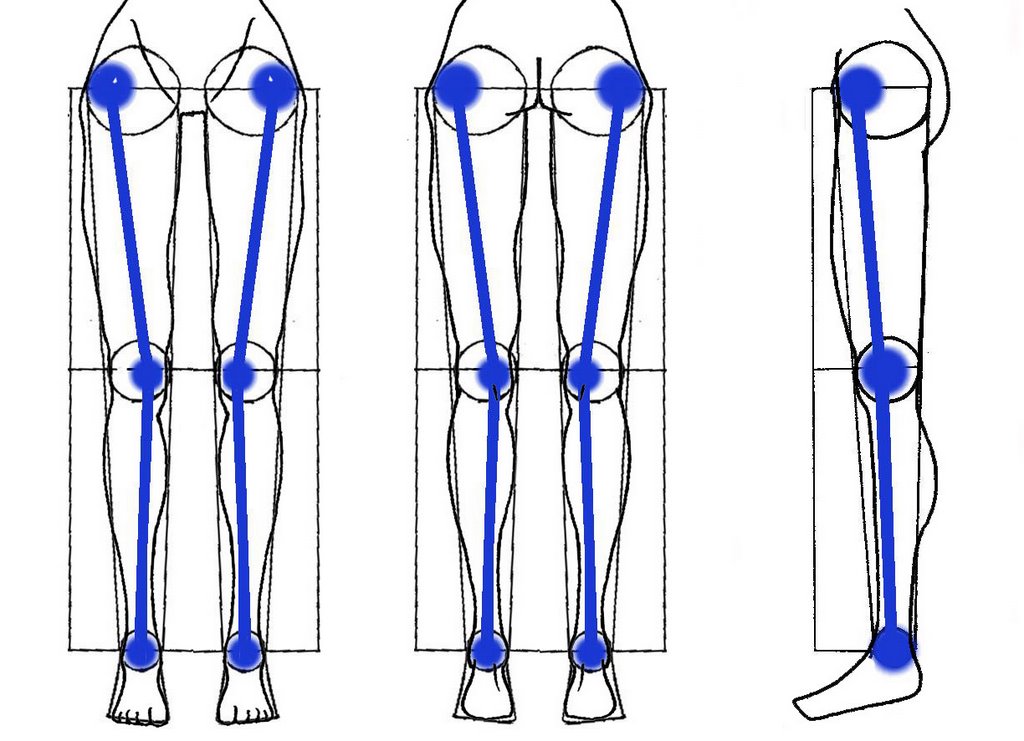
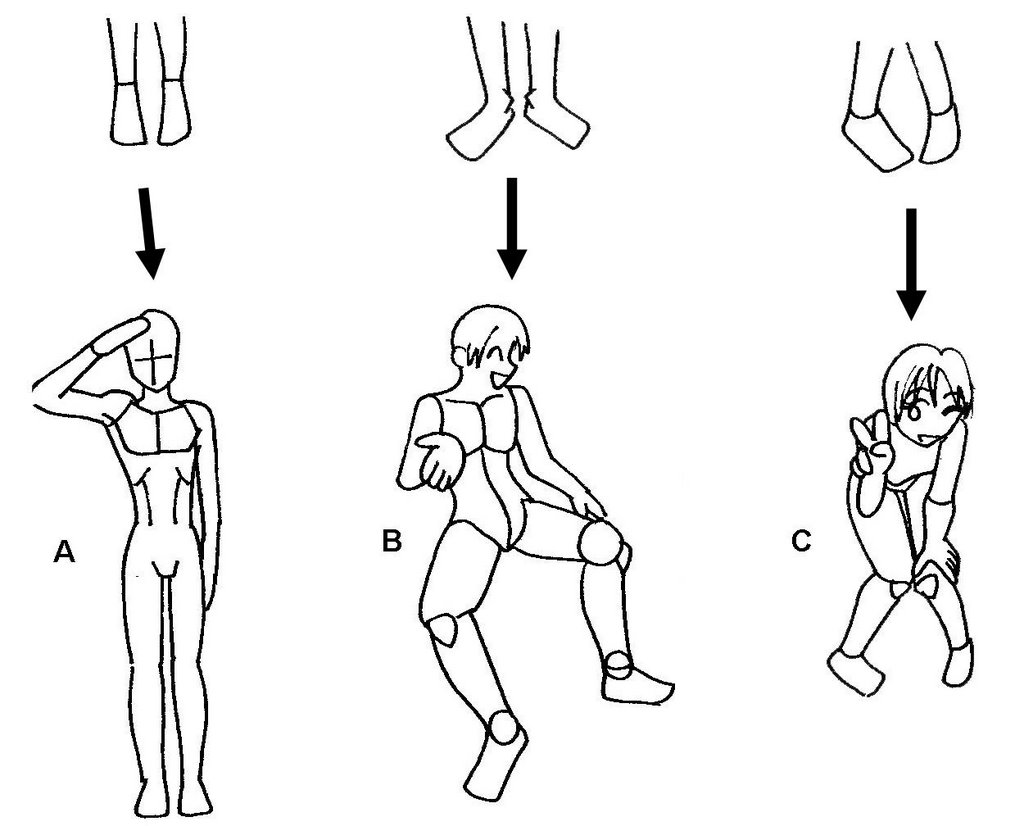
From left, the first one is the leg’s joints: from butt, then knee, then to the ankle; the left one is normally when people standing straight
The center one is the people resting their weight in either one of their legs
The one at the right is posing with “coolness” like how those model does, pretty cool


PICTURE8

I used the model at the right and drew this picture, the model stretch to side very dynamicly.


that's all for now, coming next: "how to draw legs XD"