
the stationery face
Today i managed to finish my subject - Digital Media's assignment, Neo: "make a face with 5 stationery, using photoshop" and now is already 7am
below is the report and process on how i made the face
THE FACE
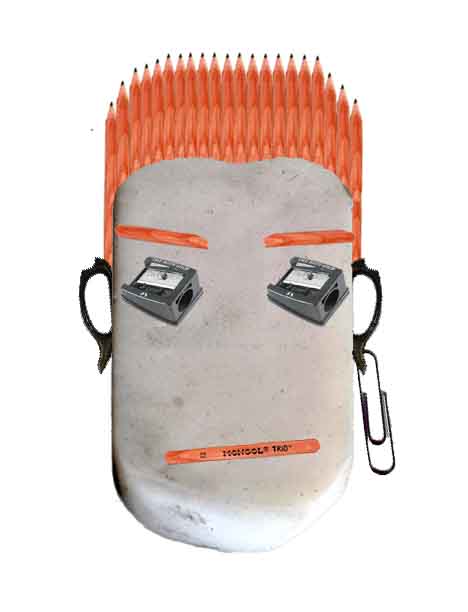
and the face above is being made from these materials:
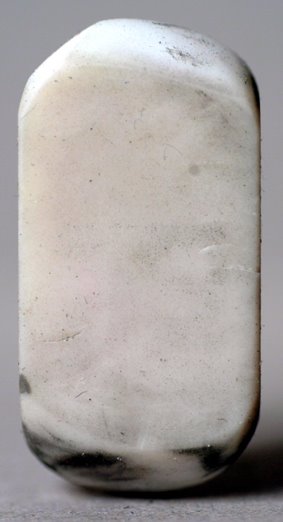
base: eraser face
1.) first, i use the eraser as the base of the face, i rotated the eraser up-side down because the eraser was dirty and it wouldn't look nice

eyes - sharpener
2.) the next process comes when i add in the eyes using the resized version of the sharpener
and this functions something like a guideline to make sure all of the facial traits are in place and correct proportional-wise
ear - scissor's handle
3.) i then cropped the handle of the scissor to use as the face's ear, putting it same height as the eyes
his left ear is mirrored because i want both ear to have the same size
and the ear is being put under the base of the face because overlapping it doesn't look good

hair, eyebrow and lips: pencil
4.) after having the basic face done, i add in the hair pencil by pencil after i cropped it out, the side of the hair is being placed under the layer of the eraser and the ear, so that the hair won't cover the ear and have a tidy look
i use the pencil to make a spiky hair look
and after putting up the pencils, i use the "eraser tool" to rub the unnessary hair to have a human hair line
then, i add in the eyebrow and lips, same as above, i use the eraser tool to touch up the shape of it
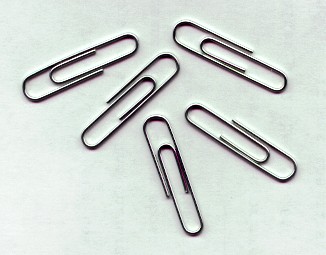
the ear ring: paper clip
5.) the fifth item will be only for decoration purpose as the requirement is 5 items to make a face
the paperclip is being used to symbolised the ear-ring
the paperclip is being cropped and placed under the layer of left-ear
artwork is supposed to look nice, therefore i chose to use 4 items for the face and 1 to enhance the looks
pls comment.
posted by coffee-ping @ 4:06 PM
2 comments
![]()


